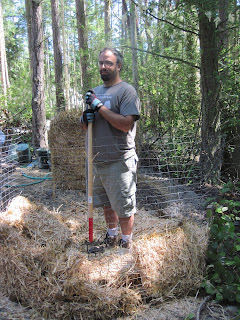
The old compost pile got full in a big hurry. It took about a month! I did have 2 big trash cans full of food scraps ready to go in on day 1, though.
Yesterday we built a new one. It's wire mesh fencing that we had from another project. A thick layer of straw goes on the bottom to provide extra carbon and catch liquid - we used a whole bale here.
The new pile has about twice the volume of the previous one. I hope it will last more than twice as long, as the compost should shrink over time as it loses water. But considering my plan to let it sit for a whole year, I'm going to end up with quite a few compost piles.
Now I just need a way to get out.
Saturday, July 30, 2011
Sunday, July 10, 2011
Yurt raising, continued
The plan was to put up walls on day 2. There was light rain in the morning, and I didn't want to trap any moisture in the wall layers. So we told our helpful friends not to come, and spent the day running errands.
By the late afternoon it had dried out, so Julie & I decided to go at the walls ourselves.
While the roof has 3 layers (a thin, white liner, a foil-faced bubble-wrap of insulation, and a heavy canvas cover), the walls are in two layers. The outer layer is the same heavy canvas as the roof. The inner layer is foil-faced bubble-wrap, with a piece of white liner sewn on one side.
The outer canvas is in two pieces: a large one around 70' long that covers 3/4s of the perimeter; a small one around 23' long that covers the other 1/4. The two doors sit at 6 o'clock and 3 o'clock. Get it? There are cutouts for windows, with sewn-in fly screens, a clear vinyl window held by velcro, and a heavy roll-down outer cover.
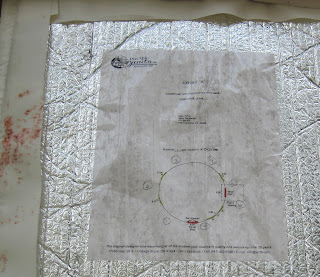
The inner insulation comes in pieces. There are 5 identical window pieces + 7 panels of varying length. It's a puzzle to figure out which insulation piece goes where. A new yurt comes with these details, but we don't have them. We do have this key attached to one of the insulation panels:
The instructions say to hang up the insulation panels first, loosely. Then install the outer canvas cover, and cinch it down just right. Then go back and align the panels and zip-tie them in to place. This is wrong. It's easier to put the canvas on first. You can slide the insulation in from underneath next, aligning it with the canvas that is already in the right place. We didn't know this, so we attached the insulation according to the instructions. The result looks like a classic UFO:
We did get a little help with the larger canvas wall, because it's heavy and there was lot of tedious ladder work on the uneven ground there. Once we got it up that was enough for the day; making it snug will come later:
Thursday, July 7, 2011
Yurt raising: day 1
Here are some pics from a day of yurt raising:
Getting the top canvas cover on was the hardest part, as expected. It's big, heavy, and unwieldy. We passed it up through the hole in the roof, and the spread it out and wrestled it in to place. It went smoothly thanks to many hands.
Today it's a little rainy so we're going to wait to put on the walls.
Subscribe to:
Posts (Atom)


