Our neighbor offered to sell us her yurt. It includes the yurt platform, which is a significant expense. We have to move it.
It's 30' in diameter, for about 700 sq. ft. internal space. It was made by Pacific Yurts in 2004.
In talking to folks about yurts, I've learned that there's a lot of confusion about them. Many people think you're not required to permit them because they are temporary, like a tent. The building inspector I talked to didn't agree. He says that you can put one up for < 180 days without a permit.
My understanding is that the building department is complaint driven, meaning they won't notice an unpermitted structure unless someone complains to them. I bet you could put a yurt up without a permit for decades, and unless you pissed off your neighbor, it wouldn't ever be a problem. And if that did happen, the 180 day clock wouldn't start until that day. That's not my plan, though - I am going to permit it.
To permit it as a dwelling I'd have to install heat, plumbing, and a septic system. I don't want to do that, so I'm going to just permit it as a storage building. I can't live in it, and I can't install plumbing or heat, but it would still be very useful during construction of the house. And I have the option of converting it to a dwelling and renting it out in the future.
One advantage of going through this process is that it's easier than permitting the actual house we plan to build. So it lets us learn about the process and work out a bunch of issues (like roads!) without tying it to all the complexity of a residence.
To get the permit, I have to fill out a bunch of forms:
- A Master Permit Application, which is pretty simple in this case.
- Address request
- Road approach
- Stormwater calculation worksheet
In some ways it's simple. There's no existing "impervious surface" that affects stormwater. There's no plumbing, etc.
The county requires engineering calculations on the structure of the yurt. Pacific Yurts sent me the documentation. It's 87 pages long!
Thursday, September 23, 2010


Road approach
I went to the county building department for information on applying for a building permit. I have to apply for an address and a "road approach". This turned out to be interesting. Here's a map for reference:

N. Jacob Miller is a paved, county-maintained road. Rainshadow Dr. is a private road that serves some upscale houses to the North. I think that those folks don't want to share their road with us.
When my area was platted, they drew in roads around each block, but none of them were ever built. My land is surrounded by Market, Fern, Moss, and Sutter streets, but they don't exist. It's all wooded, but people in the area cleared along the green lines marked above, and it's drivable.
I asked the building department if I could put a driveway in to Fern or if I had to go to Sutter, and they referred me to public works. There I learned that, since these roads weren't built within 5 years of platting, the county has no interest in them any more. So these streets don't really exist. I can put in a driveway to any of them, without a road approach permit.
However, an address would be on N. Jacob Miller Rd. The way the county does addresses is based on mileposts. They measure the distance from the start of the road to the address, in 100ths of a mile. Then they tack on an extra digit - evens on the right side of the road, odds on the left. In this case, we are 0.75 miles from the start of N. Jacob Miller, so possible addresses are 750, 752, 754, 756, and 758. And they are already taken:

To fix this situation, we have to create a new road (what would have been Sutter), with a new name, and number off of it. I can't use the name "Sutter" because it's already used slightly to the East. See it here, marked in yellow:

I may also petition to name what-was-never-Fern, because I'd like my driveway to connect there.
Once the naming happens, all the addresses around the new streets get new addresses, based on the same algorithm. For example, 754 N. Jacob Miller is about 500ft. down, so it might get 90 New Rd. If I don't name Fern, then 750 and 756 will get renumbered on to New Rd. If I do rename it, then they get numbers on Another Rd.
The name has to be unique in the county (here's the current list). It can't even sound like an existing name, so that emergency radio communication isn't confusing. It can't be vulgar or obscene. (Which is which?).
There's already a Memory Lane and a No Way in the area, so those are out. What names would you use?

N. Jacob Miller is a paved, county-maintained road. Rainshadow Dr. is a private road that serves some upscale houses to the North. I think that those folks don't want to share their road with us.
When my area was platted, they drew in roads around each block, but none of them were ever built. My land is surrounded by Market, Fern, Moss, and Sutter streets, but they don't exist. It's all wooded, but people in the area cleared along the green lines marked above, and it's drivable.
I asked the building department if I could put a driveway in to Fern or if I had to go to Sutter, and they referred me to public works. There I learned that, since these roads weren't built within 5 years of platting, the county has no interest in them any more. So these streets don't really exist. I can put in a driveway to any of them, without a road approach permit.
However, an address would be on N. Jacob Miller Rd. The way the county does addresses is based on mileposts. They measure the distance from the start of the road to the address, in 100ths of a mile. Then they tack on an extra digit - evens on the right side of the road, odds on the left. In this case, we are 0.75 miles from the start of N. Jacob Miller, so possible addresses are 750, 752, 754, 756, and 758. And they are already taken:

To fix this situation, we have to create a new road (what would have been Sutter), with a new name, and number off of it. I can't use the name "Sutter" because it's already used slightly to the East. See it here, marked in yellow:

I may also petition to name what-was-never-Fern, because I'd like my driveway to connect there.
Once the naming happens, all the addresses around the new streets get new addresses, based on the same algorithm. For example, 754 N. Jacob Miller is about 500ft. down, so it might get 90 New Rd. If I don't name Fern, then 750 and 756 will get renumbered on to New Rd. If I do rename it, then they get numbers on Another Rd.
The name has to be unique in the county (here's the current list). It can't even sound like an existing name, so that emergency radio communication isn't confusing. It can't be vulgar or obscene. (Which is which?).
There's already a Memory Lane and a No Way in the area, so those are out. What names would you use?
Parcels in my area
Long ago someone platted out the neighborhood as 270' x 270' blocks, with 60'-wide roads and an alley through the middle of each block. Each block had 10 rectangular lots. It never got built that way, but you can see the remnants of that plan here:

The brown outline would have been a block, and the red is a single lot. You can still see the shape of the alley, too.
Since then, many parts of the county's rights-of-way have been handed over to the property owners adjacent, resulting in the complex set of property boundaries you see above. (The process for doing that is either "vacation" or "quiet title".)
The previous owner of my parcels did a "boundary line adjustment", as well as vacating the alley. So my parcels run North/South, while many others run East/West.


The brown outline would have been a block, and the red is a single lot. You can still see the shape of the alley, too.
Since then, many parts of the county's rights-of-way have been handed over to the property owners adjacent, resulting in the complex set of property boundaries you see above. (The process for doing that is either "vacation" or "quiet title".)
The previous owner of my parcels did a "boundary line adjustment", as well as vacating the alley. So my parcels run North/South, while many others run East/West.

Monday, August 16, 2010
An updated floor plan
 It has been a while since I updated this blog. I don't have much new to say, but here is the latest design.
Things that have changed:
- Only one bedroom
- Kitchen changed shape - U opening West instead of South.
- Walls now 2' thick. The people who built the 1950 house I'm in now did the minimum then, and we suffer for it today. I figured as long as I'm going through the trouble of building the house, I want to over-do the insulation.
- Front door is now on the North side, near parking. The South side will open, perhaps a French door, but will not be a thoroughfare.
- The construction is likely to have large wood posts every 8' O.C. around the perimeter. On the south side, imagine the space between being almost all window, for solar gain and lovely views.
- Sketched in framing detail. Pairs of round posts in the corners, ideally from whole, peeled trees from our land. Pairs of 6"x6" milled timbers along the sides.
What's missing
The utility room may be too small.
We'd like some more closets.
I'm thinking the house could be a little bigger. We tried to buy a house last year at 1500 sq. ft. My design is about that, but has 2' thick walls. A 50' x 30' house with 2'-thick walls has 320 sq. ft. just in the exterior walls! I can add a little area and still call it 1500 sq. ft.
I threw a bunch of windows on the South. It's not quite right, just a sketch. Also, need a few windows on the other sides.
Slipform cordwood idea
I want to do slipform stone masonry for the first 2' of the walls. You rip a sheet of plywood in to a pair of 2' x 8' panels, brace with some 2"x4"s, and set them on either side of the wall as forms. Large rocks go in, followed by mortar. (To do a whole wall, you do it again 2' higher, repeating all the way up.)
I will attach my forms to my posts, making it easier to position them just right. I will only do 1 course of stone, as an accent and to protect against rain splash.
One of the problems in cordwood masonry is the detail where interior drywall butts against exterior cordwood. Cordwood typically has an uneven surface, and I want a clean, sealed joint with the drywall, for soundproofing.
My idea is to continue to use the 2' x 8' slipforms on the interior, as we build the cordwood wall. This will create a more even interior surface, which the drywall can butt against more cleanly. The exterior will have recessed mortar, as is common in cordwood construction.
Monday, May 31, 2010
Mapping out the land
I've been stuck on two problems. Later I'll write about the footing details, but right now I want to look at the mapping difficulties. This isn't the first time I've written about this problem, and it probably won't be the last.
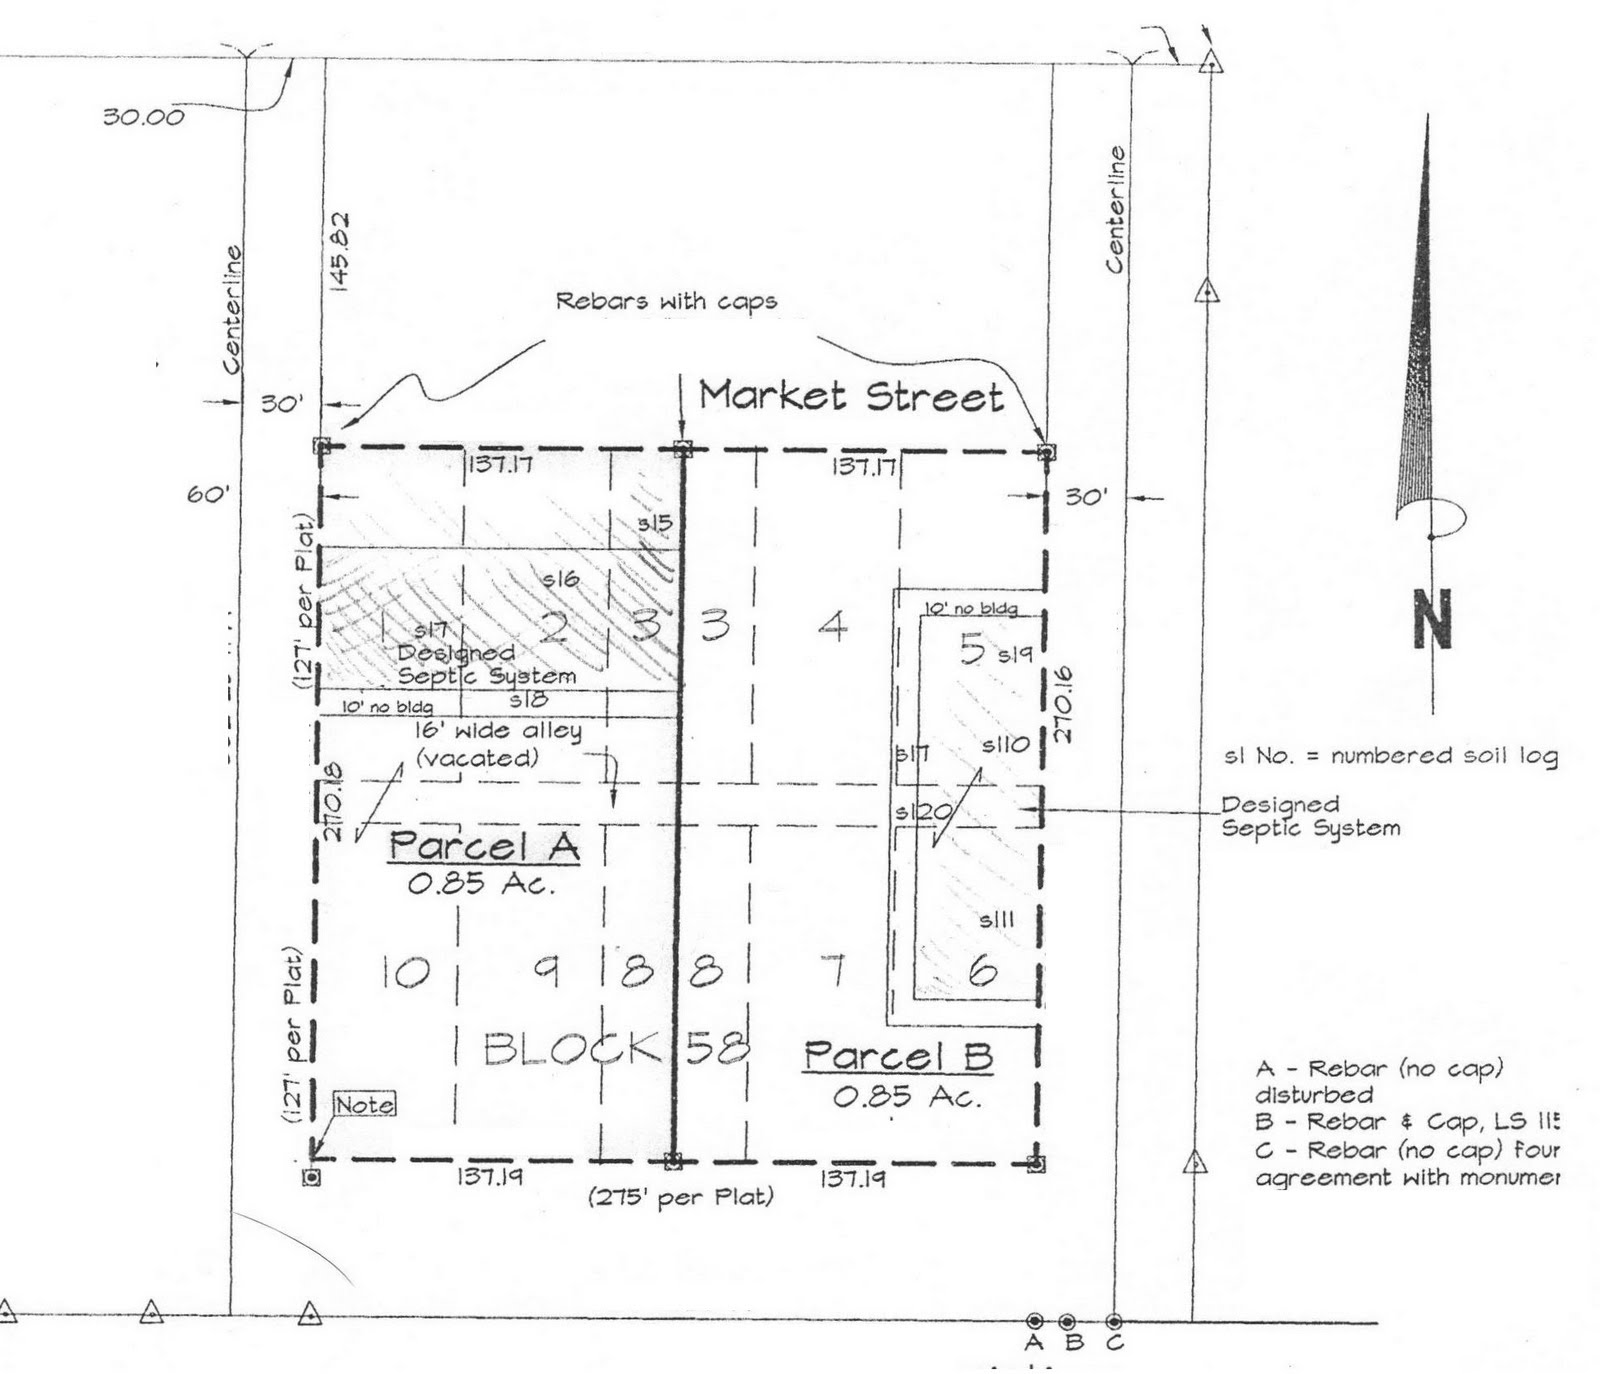
The land is a full city block, 270 feet on a side. It is split in to two equal-sized parcels. The orientation is close to North/South, but appears to be about 3 degrees askew from true north. I can accept that error for now. (It appears to be ~7 feet off when I'm 1/2-way between two marked points, calculated as 'tan(3 degrees) * 270 / 2' but my trig is weak.). The great news is that it's already surveyed, with rebar at each of the corners.
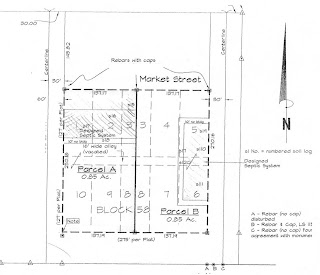 I want to cut down as few trees as possible. I love the woods, and putting trees back is hard to do quickly. I know we'll clear some to build the house, and more later, but I want to do it incrementally. So, I walk around the land looking for areas that are already pretty clear, having few trees, or trees that are very small, or short-lived trees like Alder. I want to mark these down on the above map, but that is turning out to be tricky.
I tried using a compass and measuring tape, but ran in to a few difficulties:
- Taking a bearing on a compass is hard! Siting down the needle at a landmark is highly inaccurate. Maybe I can get within 5 degrees.
- The land is full of brush, making it hard to run a tape measure in a straight line.
- The land is full of brush (still?), making it hard to get around.
- The land is full of brush (no!), so I can't put up a reference string around the borders
I tried using the GPS unit that came with my Streets and Trips software, but it seems like the accuracy too far off for my purposes. I am going to try a GPS unit with WAAS next week.
As for getting around in the brush, I tried pulling Salal by hand (it works, but it's really slow) and I tried cutting with a machete (not much luck, maybe I'm not using it right). I'm going to look in to renting a brush cutter (a weed eater but with a blade instead of a string), and possibly buy a small tractor with a loader and excavator (should be useful in the future around the homestead).
The land is a full city block, 270 feet on a side. It is split in to two equal-sized parcels. The orientation is close to North/South, but appears to be about 3 degrees askew from true north. I can accept that error for now. (It appears to be ~7 feet off when I'm 1/2-way between two marked points, calculated as 'tan(3 degrees) * 270 / 2' but my trig is weak.). The great news is that it's already surveyed, with rebar at each of the corners.
I tried using a compass and measuring tape, but ran in to a few difficulties:
- Taking a bearing on a compass is hard! Siting down the needle at a landmark is highly inaccurate. Maybe I can get within 5 degrees.
- The land is full of brush, making it hard to run a tape measure in a straight line.
- The land is full of brush (still?), making it hard to get around.
- The land is full of brush (no!), so I can't put up a reference string around the borders
I tried using the GPS unit that came with my Streets and Trips software, but it seems like the accuracy too far off for my purposes. I am going to try a GPS unit with WAAS next week.
As for getting around in the brush, I tried pulling Salal by hand (it works, but it's really slow) and I tried cutting with a machete (not much luck, maybe I'm not using it right). I'm going to look in to renting a brush cutter (a weed eater but with a blade instead of a string), and possibly buy a small tractor with a loader and excavator (should be useful in the future around the homestead).
Habitat for Humanity
I signed up with Habitat for Humanity, as a way to learn more about house building, on someone else's house. It seems like a good trade: they get my help, I get to learn. Perhaps I could draw some comparisons to apprenticeships.
The first day I got to build a set of steps. They work out of a semi-truck, with a door 4' off the ground. With an experienced carpenter calling the shots, we designed & built steps (6 of them), a landing (3' x 4'), and a handrail. Now that I've been up and down on it a bunch of times, I can say that we did a good job.
They are building 3 houses at once, right next to each other. The excavation of all 3 was done by professionals, as was the concrete work on house #3. The concrete work on houses #1 and #2 are volunteer-built. Some of the volunteers are locals (like me). The last two weeks were filled by the RV Care-A-Vanners, volunteers who travel around in their RVs building houses for Habitat. They're all at least a couple decades older than me, but they can beat me around the work site. Just when I think I'm keeping pace with them, I remember that they do this 5 days / week for two weeks, while just show up when I can. Wow.
On later days I helped build footing forms, then foundation/stem wall forms, then stripped forms off the concrete. Here you can see a detail of how we braced a corner before the pour:

The last couple times it was raining all day. Rain + concrete + excavated glacial till subsoil = pretty dirty work. I still managed to convince Julie to join me one day. Here she is looking sodden:

This activity has taken me away from directly working on our own house, but I suspect that the net result is a time savings, as my skills and knowledge improve. It has been especially helpful to compare the practices of the professional on house #3 to the way the volunteers work on #2. Getting two perspectives helps me see much more of the whole picture.
The first day I got to build a set of steps. They work out of a semi-truck, with a door 4' off the ground. With an experienced carpenter calling the shots, we designed & built steps (6 of them), a landing (3' x 4'), and a handrail. Now that I've been up and down on it a bunch of times, I can say that we did a good job.
They are building 3 houses at once, right next to each other. The excavation of all 3 was done by professionals, as was the concrete work on house #3. The concrete work on houses #1 and #2 are volunteer-built. Some of the volunteers are locals (like me). The last two weeks were filled by the RV Care-A-Vanners, volunteers who travel around in their RVs building houses for Habitat. They're all at least a couple decades older than me, but they can beat me around the work site. Just when I think I'm keeping pace with them, I remember that they do this 5 days / week for two weeks, while just show up when I can. Wow.
On later days I helped build footing forms, then foundation/stem wall forms, then stripped forms off the concrete. Here you can see a detail of how we braced a corner before the pour:

The last couple times it was raining all day. Rain + concrete + excavated glacial till subsoil = pretty dirty work. I still managed to convince Julie to join me one day. Here she is looking sodden:

This activity has taken me away from directly working on our own house, but I suspect that the net result is a time savings, as my skills and knowledge improve. It has been especially helpful to compare the practices of the professional on house #3 to the way the volunteers work on #2. Getting two perspectives helps me see much more of the whole picture.
Thursday, April 15, 2010
Lemonade
I worked on the "ferry" floor plan a lot, but couldn't ever get something I liked. It solved some of the problems in the "straight water wall" plan, but introduced some new issues, especially around the flow of the house. If I put the kitchen sink on the south side of the water wall, then the kitchen juts out in to the living area. Then the path through the house gets long and complex; it breaks the flow. Also, I never found a good place for an entry area.
After pushing and pulling on the shapes and not feeling good about the results, I decided to table it and try something different. I went back to the straight water wall plan, and pushed and pulled. A few things started to fall in to place. Finally things started falling in to place. I now present to you the result of that effort, the "lemonade" house. (The name is pretty arbitrary; I was drinking lemonade at the time.)

Strangely I ended up with a U-shaped water wall like the ferry house that I had discarded. I think having it only 6' deep made things work out much better.
After pushing and pulling on the shapes and not feeling good about the results, I decided to table it and try something different. I went back to the straight water wall plan, and pushed and pulled. A few things started to fall in to place. Finally things started falling in to place. I now present to you the result of that effort, the "lemonade" house. (The name is pretty arbitrary; I was drinking lemonade at the time.)
Strangely I ended up with a U-shaped water wall like the ferry house that I had discarded. I think having it only 6' deep made things work out much better.
Things that work well:
- flow from one end of the house to the other is simpler than before
- kitchen isn't crowded against the South wall, nor is it so far back that no south light comes in
- It's 1246 sq. ft. heated area, so it should qualify as an ADU, if I understand the rules correctly
- 49'8' width is what works out well if I put 8" x 8" full-dimensioned posts on 7' centers, which is pretty arbitrary
I have some ideas about how the kids room will work out. Maybe a couple alcoves for beds, so the kids have their own spaces without having separate rooms. Maybe some closets in the middle to separate things a bit. Maybe we start simple and add more later. I need to understand the code requirements better, especially around septic system sizing, before I decide.
- kitchen isn't crowded against the South wall, nor is it so far back that no south light comes in
- It's 1246 sq. ft. heated area, so it should qualify as an ADU, if I understand the rules correctly
- 49'8' width is what works out well if I put 8" x 8" full-dimensioned posts on 7' centers, which is pretty arbitrary
I have some ideas about how the kids room will work out. Maybe a couple alcoves for beds, so the kids have their own spaces without having separate rooms. Maybe some closets in the middle to separate things a bit. Maybe we start simple and add more later. I need to understand the code requirements better, especially around septic system sizing, before I decide.
I wish the middle space was a little bigger. Our current house (which fits us fine) has about 100 sq. ft. more dedicated to the living room / dining room / kitchen. My drawing makes better use of that space, and part of the current living room is used for kids' toys, which could move in to the kids' room. On the other hand, making the public space as attractive as possible is good for bringing the family together.
I am thinking about the main entrance on the South being through a greenhouse. Imagine French doors to the greenhouse, which are kept open much of the time. Attaching a greenhouse to a cordwood building works well, as the thermal mass of the cordwood wall will moderate the temperature of the greenhouse (something greenhouses often struggle with). The greenhouse would help us capture a little more heat in the winter, and clean the air. It could also function as a mudroom, leaving that interior space open. It would be a beautiful space that makes a transition from the outdoors to the indoors, both emotionally and thermally.
I have spent almost 0 time in greenhouses, so I don't know how it would look, or how to make it beautiful, or if they're pleasant to be in. Even thought I don't plan to actually build the greenhouse until well after the house is complete, I'd like to make the best plans for it I can.
Also, an interesting note about post strength. I ran through the math on the weight of the roof structure + snow, and looked at how strong the posts need to be to carry it according to code. For #2 Douglas Fir, the total cross-sectional area of all posts in the whole house, put together, needs to be about 7" x 7". Yeah, that's not much. Of course, the girt/girder/rafter/joist spans to hold all that weight would be insane...
Anyway:
- How would you adjust the spaces in this floor plan?
- Where would you put some doors?
- What do you think?
Subscribe to:
Posts (Atom)