Tuesday, May 24, 2011

How to build a yurt platform - part 8

With the posts in place, it was time to install joists.

My carpenter was feeling better, but I decided to continue on our own. I was annoyed about some decisions he made that made a lot of trouble for me. I think that putting the pier blocks on the ground would have been fine. Perhaps with a little digging & filling in the soft spots, but I ended up with 5 yards of gravel packed in to holes. Also, the 12 marking strings parallel to the centerline (and their 24 batter boards) were unecessary; I could see that but he couldn't. He's probably a great carpenter, but his plan for a yurt deck weren't ideal. I'm not a great carpenter, but I figured I could handle it, and I was looking forward to the experience.

So, joists. Here's the manufacturer's suggested design:


They suggest 8', 10', and 14' lumber for the joists. When the yurt was in its previous site, several of the joists were much longer. This is a good thing, as it's stronger: load on one span partially transfers to the next span.

6 of the beams from the previous site were untreated lumber. I think they just found some 4" x 6" beams cheap, maybe from some other project, and put them to use. We decided to replace them with treated wood, so they wouldn't be the weak spot in the new deck. I bought a few 20' x 4" x 6" beams from the lumberyard and hauled them home on the lumber rack on my F-250. (And I used to be a computer programmer!)

I wonder how important the treating really is. Houses are built with untreated joists over a dirt crawlspace, and they last plenty long. Sill plates are typically treated, but that's because they rest directly on the concrete foundation. None of my wood rests on the ground or on concrete. It's all protected from direct rainfall. Maybe a little rain water can splash up off the ground, but you could just make the posts treated, or add a plywood skirting around the perimeter to keep out rain. Treated wood is expensive; you need special fasteners; its a health hazard to work with; the sawdust pollutes; its splinters hurt more; it's less straight.

My strategy was to install the middle joists first, then measure off them as we worked our way out. (Working from one side to the other would magnify error.) We plumbed 3 posts with material under the pier blocks and aligned them as best we could. We put the joist in place and leveled it out with a 4' level by adding/removing material under the pier blocks. We slid the pier blocks side to side to get the alignment right.

At the previous site they nailed the framework together. Taking that apart was such a pain, so I insisted on screws. Simpson Strong-Tie sells structural screws to go with their metal bracing, hot-dipped galvenized for use in ACQ pressure-treated wood. 1.5" screws are $15 per box of 100. They are nice to work with. Heads are 1/4" hex. Framing took about 4 boxes.

We did it repeated the process with the adjacent joist, and then leveled them relative to each other and set them 48" apart on center. Once everything looked good, we the joists against the posts (making many triangles) and against each other (more triangles).


We continued the process over all 30 pier blocks, for a total of 180' of joists.

This was a very tedious process. The pier blocks can move along the joist (not very important, except at the end of the joist). They can move across the joist (important). To plumb the posts, I would move the pier block, adjust the ground underneath, and restore the block. The tops of the posts have to be level in two directions, which I did by adding & removing material under the pier block. Each adjustment can affect all the others. So we would measure everything (4' level, tape measure, and post level), then adjust the one that was worst, then repeat.

I learned a few tricks along the way:
  • If the pad under the block is pretty level, you can slide the block around without changing height of the joist.
  • You can bend the metal bracket on the pier block to get the post close to plumb without moving the block.
  • You can screw the post on to the joist with just 1 screw, brace the joist at 48" O.C. from the previous joist, then slide the block around until its plumb.
Once the joists were all in place and braced together, we filled in holes around the pier blocks with soil. Our soil is normally very hard. When you dig it up and mix it with water it's a very slippery mud, but when it dries out it's very hard again. The idea is to stabilize the pier blocks, to stop them from slipping sideways. I started with the spoils of our previous digging, but then I switched to fresh, loose soil from the septic install.

Next: bracing / flooring / insulation / perimeter blocking

How to build a yurt platform - part 7

After placing the pier blocks, it was time to install the posts.

I knew I wanted to leave enough room to crawl under the yurt when it was done. And I'm a big guy. Also, extra height means dry storage space.

However, more height also means more steps to build and climb, more post material (4" x 4" pressure treated), and more diagonal bracing for stability. I figured that most of the under-yurt work would be at the perimeter, so crawling all the way across wasn't too important. And I figured I could do that with 18" clearance. Since the ground is uneven, we decided to leave 18" clearance at the minimum, and the rest would have a little more room.

When I actually looked at the highest spot (shortest post), the ground rose up just outside the site, which would make it difficult to get in there. Better to be a few inches too high than a few inches too low, right? I looked at the bits of wood I had and selected one that was a bit longer, maybe 20". On top of the pier block + bracket there's at least 2' of clearance at the minimum, almost 3' at the max. I screwed it in to place and we had our reference post. We're framing!


The carpenter (still sick) was going to use a water level to measure all the posts to the same height. I decided to go with a laser level instead (Agatec 220G, rented for $50 for a day). It's a pretty fancy device. You put it in place and turn it on. It levels itself, then it spins a mirror, projecting a laser out in a very accurate horizontal plane.

You can use a laser level in several ways:

1. Position it at exactly the height you want to cut. This seems hard. If the laser gets jostled, putting it back in the exact same spot seems hard, too. If you hold a post in place you can see the laser on the wood, and mark the spot to cut. Unless its sunny, then you can't see the laser.

2. Position it at exactly the right height, as before. Still hard. There's a receiver that can attach to a big aluminum yardstick. Place this stick in the pier block, move the receiver up and down until it says it's aligned with the laser, and read the length.

3. Put the laser level on the tripod at a convenient height. Put the stick on the top of the reference post. Move the receiver up and down until it says its aligned. Put post stock in a pier block. Move the stick up and down along the new post until it says its aligned. Mark that spot. Cut the post. It takes two people to steady the post & the yardstick & mark the line. Since the 4" x 4"s I bought were 10' long, they were difficult to hold this way for the first couple cuts.

4. Put the laser level on the tripod at a convenient height. Put the stick on the top of the reference post. Move the receiver up and down until it says its aligned. Hold the stick over a pier block while someone else measures the gap with a tape measure. This is very tedious. Transfer that length to the stock at the saw station.


I imagine that an experienced carpenter would have some good tricks for making this go smoothly. Our awkward, novice approach got the job done, though. At the end of the day, all the posts were within 1/8" of the reference post, which seemed good. 30 posts done.


Next: installing the joists.

How to build a yurt platform - part 6

After filling in my footing holes, the next step is laying out pier blocks.

The plan was to bring the carpenter back at this point. We made arrangments, but the morning we were to start work, he woke up sick. With 4 adults ready to work, we didn't want to wait until he got better. What it if took weeks? We decided to get started and see how it went.

The yurt manufacturer has a document on building the platform, which includes this idealized diagram:


Way back before digging the holes, we set up batter boards to map the positions of the pier blocks. The idea was to use these to place the pier blocks correctly. This turned out to be rather difficult.

The batter boards were close enough to the ground that the strings bumped right in to the pier blocks and their brackets. The strings couldn't spring to their correct position that way. You could approximate the pier blocks positions, but that's it.

(Here's an example where the pier block was low enough to let the string pass without touching. Confusing, I know.)

One option would be to build a new set of batter boards substantially higher. Use a plumb bob to line up the new strings with the old, then use it again to place the pier blocks. I don't know how to do that without buying a whole lot of lumber and doing a lot of additional building for just this purpose.

This is all 50% overkill. That's because the placement of pier blocks in the North/South orientation is not critical. Most of them can be off by a couple inches with no effect on the strength of the deck; only the ones under a joint of two joists need to be aligned well, and even those could vary by an inch without trouble. There were 13 strings running East/West, to give North/South positions, which was lot of work for very little gain. I decided to keep the centerline and discard the rest.

However, the East/West orientation matters because we want the joists 4' on center, so the 8' plywood decking will align with it properly. The joists are 4" x 6" nominal (3.5" wide, actual). The edge of a sheet of plywood rests on only half of that, so ideally it gets 1.75" bearing surface. Being off by an inch would mean only having 0.75" bearing - too little! I figure that 0.25" was close enough, and decided to aim for 0.125" (1/8th).

We used the strings to give us the best East/West location we could get. We used the centerline and tape measure to approximate the North/South position. While doing that, we also added a little small gravel (3/4" minus) and/or sand to even out the surface that the pier block would rest on. I figured we'd adjust the pier block locations as the joists went in, to make the joists be 48" on center (within 0.125"), and to compensate for joists that aren't perfectly straight. I knew I would start installing joists, and then measure joist-to-joist and adjust for the actual outcome.

In my idealized model of construction, the ground surface would be perfectly level. This is really hard to create, especially in a hole. Dragging a level across a surface while keeping it level is just about impossible. At best, you can measure level at several points, shift the material around, and level again. It's iterative.

Anyway, this approach was pointless. The pier blocks were imperfect. If you put one on level ground, its top won't be level. The metal brackets aren't perfect either, so any post you put on the bracket is not going to be plumg, or anywhere near it. I figured we'd need to add/remove material under each pier block to get the post to come out plumb. We couldn't do that until the post was installed. Installing the posts means cutting them out of the stock 4x4, which means getting their lengths right. Cutting the posts to length means knowing they're in just the right spot. We couldn't know that until joists are up, right?

I'm just talking about leveling each hole relative to itself. What if you wanted all the pier blocks level with each other? That would be very hard indeed!


Now I know a trick that makes this slightly easier: the metal brackets can be bent. So, level the surface in each hole as best you can. Place the pier blocks accoring to strings and measuring tape. As you install posts, bend the bracket to make the post plumb. Now you don't have to add/remove material to plumb the post. I didn't figure this out until I was almost done.

Next: installing the posts.

Septic install

CenterLine construction is building our septic system.

They started by knocking down trees. Stumps make a rough fence along the road. Tops make a brush pile. Trunks will become lumber. I need to hire someone with a mill - there's a lot of lumber there!

Then they had the septic designer come out and look at the site. They talked about some technical details that were largely over my head, and then some tweaks to the layout of the drain field, which was not over my head. We rotated it about 80 degrees to follow the existing contours better.

On day 3 they started digging and filling the trenches.


There are 6 trenches, spaced 6' on center, each 50' long. Trenches are excavated to 4', then backfilled with sand (ASTM 33, if you must know). Here you can see Jeff working the sand:

How to load a wheelbarrow

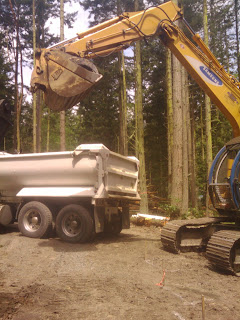
Jeff from CenterLine construction was digging trenches for my septic system today. I was working on another project, and wanted a little fill dirt. I took my wheelbarrow over to him and asked him to fill it.

I've been told that Jeff is a master with the excavator, and today I got to see why.

Monday, May 9, 2011

How to build a yurt platform - part 5

After the drain rock fiasco, I decided to get some gravel delivered instead. I ordered 5 yards this time, inch-and-a-quarter crushed rock. In this pic, a chunk has already been taken out of the right side:


After the rock was delivered, I tried working it in to a hole:
  1. Clean any loose dirt and mud out that has fallen in to the hole.
  2. Shovel gravel in to wheelbarrow.
  3. Pour in to hole, but not too much.
  4. Tamp with a 4" x 4" post.
  5. Tamp a little more with 10" x 10" tamper.
  6. Go to #2
The first hole I did was small (18" x 18" x 12"), and dry. The second one had a lot of mud in it and was bigger (2' diameter x 2' deep).  There are 30 holes total.

Muddy hole, needs cleaning.

Clean, with first lift of rock, ready for tamping.

My inlaws came to visit, so we put them to work, too. 4 adults working together, rotating between cleaning holes, loading gravel in to the wheelbarrow, and tamping.


After 2 days, we had rock in 1/2 the holes but not full enough. We were exhausted and our wrists hurt. Everyone was grumpy, and the road ahead looked too long. I decided to find a power tamper.

The rental place I usually go to had 4 small tampers, and 2 big ones. (The other rental places had 0!). It's a heavy beast, and it took 2 of us to move it from hole to hole. But it was amazing at pounding the rock in to the ground. We were able to take bigger lifts, and in the end the gravel was pretty hard and flat on the surface.

The machine wasn't easier than tamping by hand, but it was sure faster, maybe 10x faster. 

The original plan was to excavate to the frost depth (12") or hard, undisturbed soil, whichever was greater (the soft ground was never more than 12" deep). Then fill with 4" of coarse gravel for a stable base, and 4" of finer gravel (3/4" minus) for a smoother surface. But now, with the much bigger holes and the really powerful tamper, we ended up bringing the coarse gravel to 4-6" below grade, tamped smooth.

We used almost the whole 5 yards of gravel. The big pile became a small lump.

Once the coarse gravel was in, we added just a thin layer of the fine gravel to each hole. We figured we didn't need much, since the coarse gravel had tamped to such a smooth surface.

Now we were roughly back where we started, having excavated 30 holes and then filled them in again. Costs to get back to grade level:

- shovel $30
- digging bar $40
- 12" auger rental $60? (forgot)
- 24" auger / Dingo rental $200
- tamper rental $60
- 5 yard load of gravel $125

With all that done, I now believe it was unnecessary. At a minimum, we could have just placed the pier blocks directly on the ground. Topsoil was already gone. For a little more, we could have hand-dug just the looser soil, and only as far as it was easy to dig, and something smaller than 18" square. Not much gravel buying/hauling/tamping required.

Next up, placing pier blocks.

How to build a yurt platform: part 3

After running the 12" auger through all the holes, we took an unplanned break. The flu ran through the family, each person in turn, taking over a month until we were all recovered. Then we realized that fixing up a few things in the RV was more urgent than the yurt.

Meanwhile, it rained. And rained. Some of the holes had good drainage, while others filled with water and held that water well. What to do?

Feeling an urge to get the yurt done already, I rented a Toro Dingo with a 24" auger. I figured this would get all the holes done, once and for all, and we could make some progress.

One the holes were dug, it was time to buy some gravel. The plan here was to fill the bottom of each hole with coarse gravel, to provide a strong, stable base below the frost line. I went to a local gravel pit, which was enormous! These guys also do concrete and excavating. The trucks driving around me were all dump trucks, and I just had my pickup. Would they sell to me?

I walked in to the office, and said "I'd like to buy a little gravel, just a pickup truck load. Do you do that?" They answered, "Yes, it's be $16.33." But I hadn't told them what kind of gravel yet, and how much I wanted in my truck. No matter, same price.

I was to tell the guy in the loader what I wanted, and he'd put it in the truck. Whatever I wanted, however much I wanted. The loader was huge, and the guy was in a cab way above me. I told him I wanted inch and a quarter. He picked up rock from a pile in just one corner of his bucket, and poured it in to the truck bed. He was careful to spread it evenly across the bed, and didn't come close to breaking a window (thanks!).

Sadly, it was the wrong rock. It was smooth river rock for drainage. I didn't realize this until it was already in the truck. No good way to get it out. So I took it home to see what I could do with it.

As I pulled on to the road and got up to speed, the truck started to weave. Scary! All that weight in the back, but all the steering happening in the front, and it wouldn't track a straight line above 35mph. Since the trip back required a few miles on a 50mph highway, I periodically pulled over to let traffic get by.

On the way back I stopped at the rental place and picked up the loader bucket for the Dingo, to move the gravel around.

I picked up a scoop of gravel from the truck and dropped it in the hole, but it wouldn't tamp. I tried adding some 3/4" minus crushed gravel to lock it together, but it didn't help. Eventually I put the auger back on the Dingo and dug out the slurry of mud and drain rock from the holes I had experimented.

What to do with all this rock, occupying my truck, with no purpose? I attached the loader bucket to the Dingo again, and spread it as a mud-free path to the door of the RV. That worked out nicely. The Dingo couldn't reach deeply in to the bed, though, so I had to switch to hand shoveling. The rest of the rock ended up in a pile out of the way, for some future project. My poor software programmer's body was tired after that!

I vowed not to get a full truckload of gravel again, but my carpenter pointed out that a full load was not enough for the job, especially with the larger holes we now had (24" diameter, instead of 18" square).

I returned the Dingo and took some time to consider the next steps.